This is the first part of the Metal Gear Solid walkthrough for the Sony PlayStation, based on the "Normal" difficulty setting. The article covers the start of the game, mainly taking place within the tank hangar on Shadow Moses Island, and concludes with the entrance into the nuclear warhead storage building.
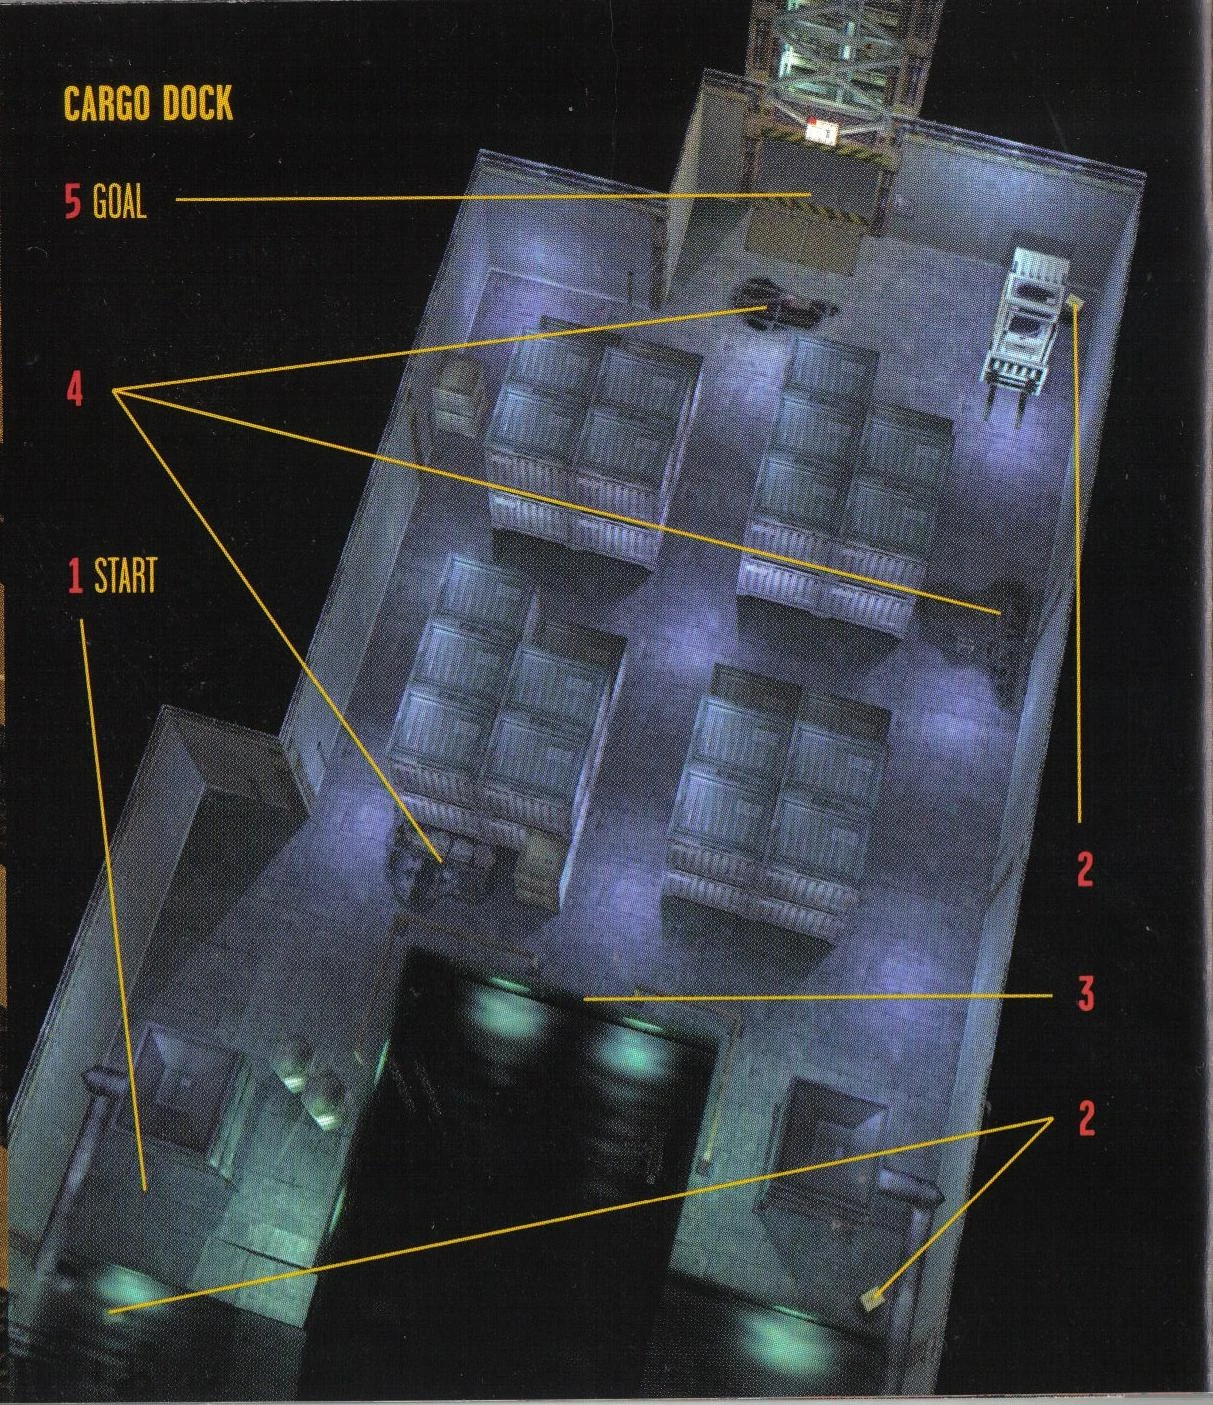
Cargo dock[]
1. Starting position
2. Rations
3. Escape route during the Alert Mode
4. Puddles
5. Elevator
Goal: Use the elevator to the north to reach the heliport.
At this stage, Solid Snake has no weapons on his person, with only the punch (![]() button) and chokehold attacks (
button) and chokehold attacks (![]() button, while stationary) at his disposal. The Scope can be used to scout the area from a safe distance, whereas the Cigarettes have no use at this stage. Avoid running across water puddles to prevent the Arctic warfare troops from hearing Snake's footsteps. Should the enemy spot Snake, triggering the Alert Mode, the opening in the railings to the south can be used to dive into the water and hide. Alternatively, the guards can be killed with the chokehold, without fear of reinforcements arriving.
button, while stationary) at his disposal. The Scope can be used to scout the area from a safe distance, whereas the Cigarettes have no use at this stage. Avoid running across water puddles to prevent the Arctic warfare troops from hearing Snake's footsteps. Should the enemy spot Snake, triggering the Alert Mode, the opening in the railings to the south can be used to dive into the water and hide. Alternatively, the guards can be killed with the chokehold, without fear of reinforcements arriving.
From the southeast starting position, a Ration can be procured by entering the water from which Snake swam in, located to the west (a maximum of two can be carried). Exit the water and crawl into the open and, while avoiding the two patrolling guards, head east to the far wall, where another Ration can be located behind the container to the south. Next, head north to the forklift, where another Ration can be found. Hide behind the forklift and wait for a third guard to arrive in the area, via the nearby elevator, then enter it in order to ascend to the heliport.
Items[]
- Ration #1 - southwest, submerged in the water behind a barrel;
- Ration #2 - southeast, located near a pipe behind a container;
- Ration #3 - northeast, located beside the forklift.
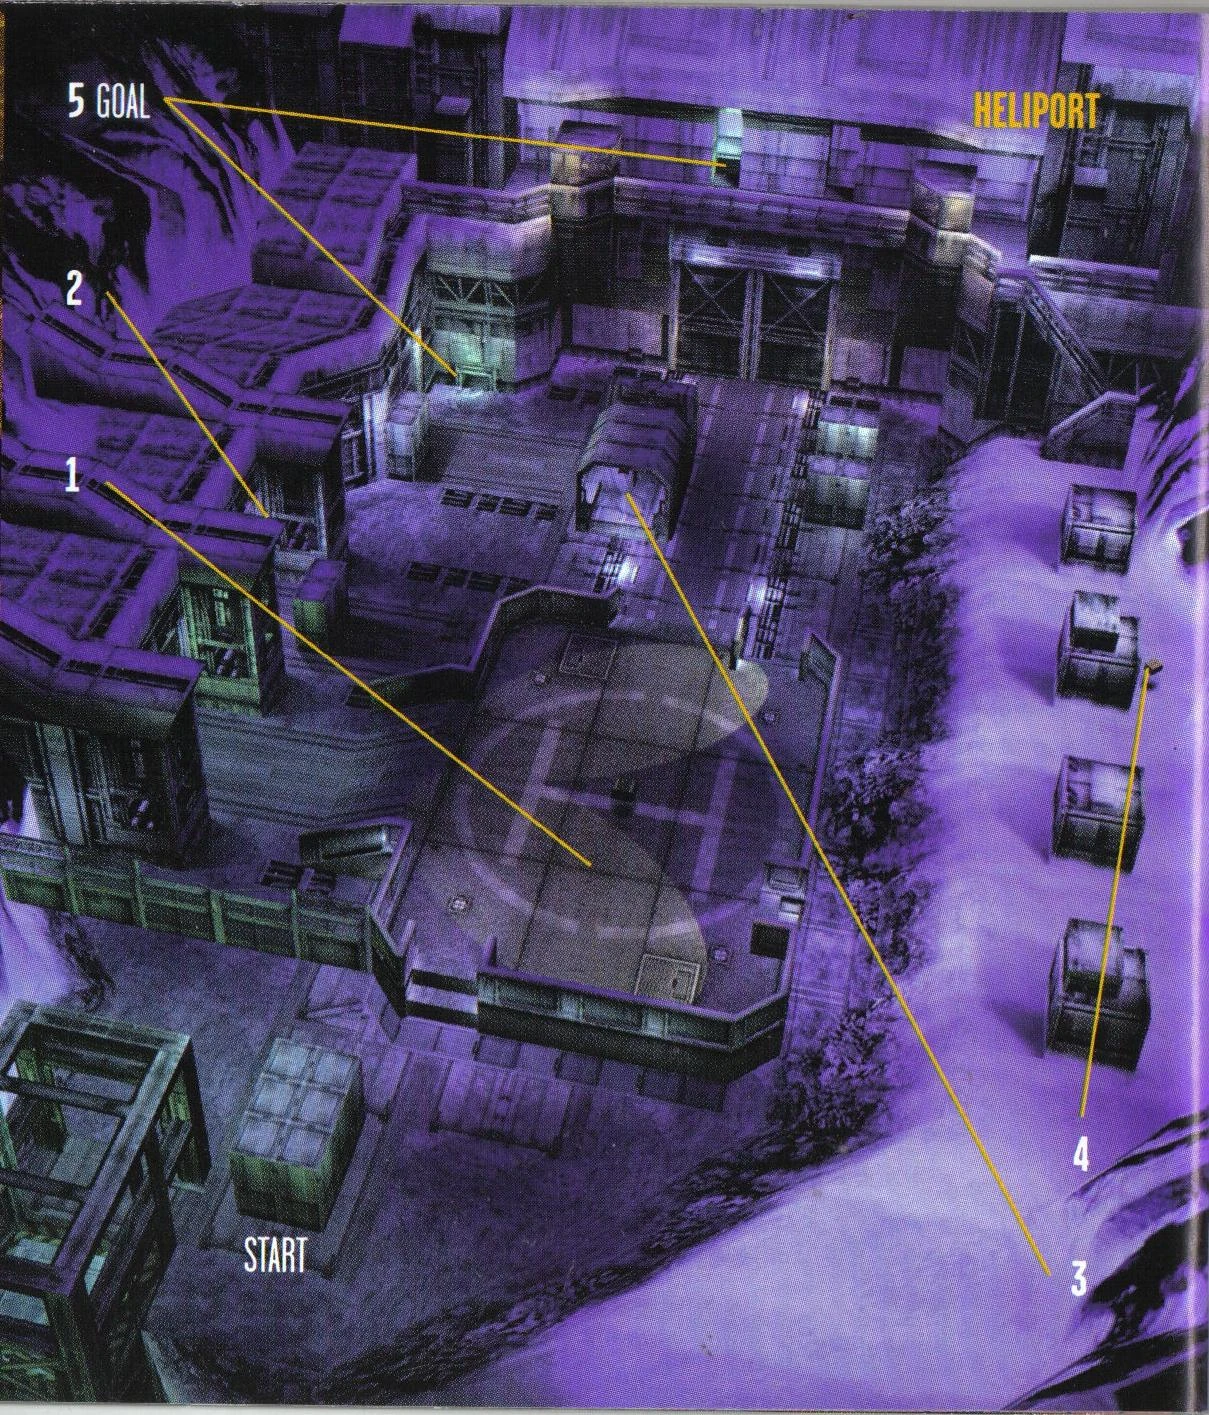
Heliport[]

1. Searchlights
2. Surveillance camera
3. SOCOM pistol
4. Ration
5. Ventilation ducts
Goal: Infiltrate the tank hangar.
Snake's commanding officer, Roy Campbell, will explain the different options for entering the tank hangar. The best way to enter the building without being spotted is the ventilation duct on the upper floor.
Head north towards the searchlights but stay out of them. Chaff Grenades can be picked up from the center of the helipad. Head to the room to the west where a surveillance camera will be spotted by Snake. By pressing against the wall and moving underneath it, the camera's sight can be avoided, and Stun Grenades can be procured. Go to the center of the area again, then head north to a cargo truck. Inside can be found the SOCOM pistol.

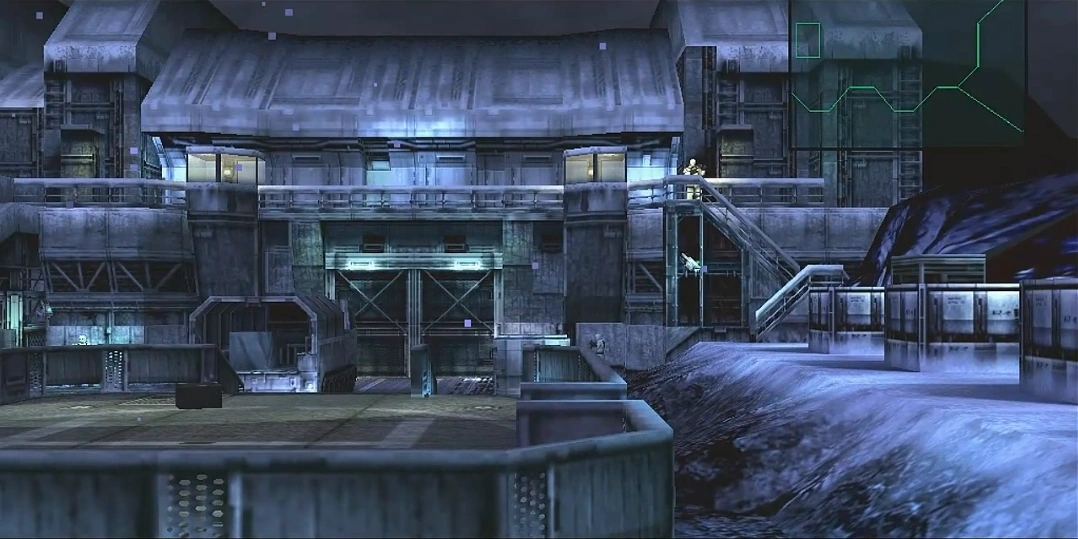
Front view of the heliport and tank hangar.
Next, head east towards the containers located on the snowy bank. Walk up the stairs directly ahead, but time it carefully to avoid a second camera. Before reaching the top of the stairs, wait a moment until the guard turns up and then walks away. Head west towards the duct and crawl into it.
- Alternatively, the lower duct can be used instead, located northwest of the truck, though it is positioned almost directly within a surveillance camera's field of view, making this a more difficult route for evading enemy detection. A sleeping guard will also be resting in front of it, provided the Alert Mode has not yet been triggered in the area. Lure the guard away by tapping on nearby walls, then either kill him, or temporarily knock him unconscious, using the chokehold. In order to avoid the Alert Mode being raised by the camera, the vent must be approached from as close to the wall as possible, pressing against it when possible. When directly in front of the duct, press against the wall and crouch down from a stationary position and crawl straight inside, to avoid Snake's legs entering the camera's field of vision).

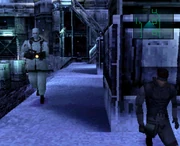
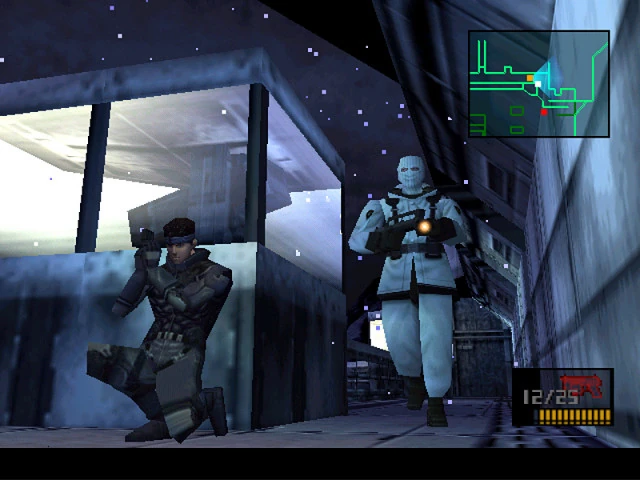
Genome Soldiers patrol the heliport.
If entering a duct during the Alert Mode Snake must quickly make his way along the vent shaft to avoid taking damage from grenades, which will be thrown inside by the enemy soldiers.

Solid Snake on the upper walkway at the heliport.
Weapons[]
- SOCOM pistol, with 12 bullets - north, inside the cargo truck;
- Stun Grenades x3 - west, inside an open storage room;
- Chaff Grenades x3 - center, on the heliport itself.
Items[]
- Ration #1 - southwest, on the west side of the Cargo Dock elevator;
- Ration #2 - northeast, behind a container.
Tank hangar (1)[]
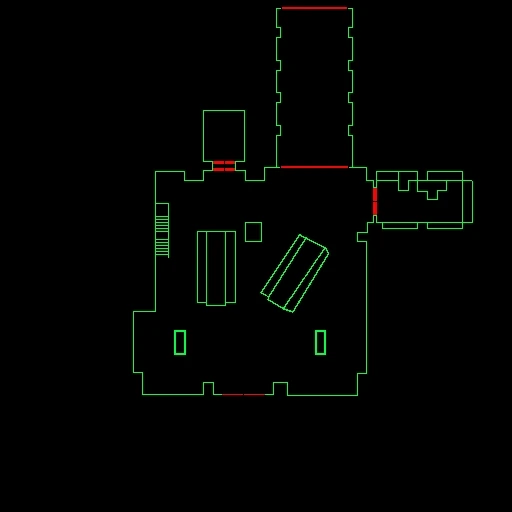
Shadow Moses Tank Hanger, 1F map
Goal: Locate the hostages.
Travel through the duct and look for an open vent cover to enter the hangar. The grates located on the sides can be used to scout the exterior, using First Person View (![]() button).
button).
Corner View Mode can be used in conjunction with the Soliton Radar to observe the surroundings.
Upon reaching the open vent cover at the end of the upper duct, climb down the ladder onto the walkway, situated above the main floor of the hangar. Chaff can be picked up to the west. Move east, either using Chaff to temporarily disable the camera, or staying out of its field of vision. Continue south and then east into an open room where Thermal Goggles can be located behind some crates, though the area is guarded by another camera. When leaving the room continue south, following the walkway around, passing a locked Lv. 1 door to the west, and another camera will be seen at the end. Either use Chaff or avoid it by hiding in a corner and carefully timing Snake's run down the stairs to the main floor.
- If the route through the lower duct was taken, follow the resident brown field mice to an open vent cover. Crawling through a submerged section of the duct will be necessary, though proceeding ahead without halting will ensure that the O2 Gauge will not deplete completely, and Snake will incur no health damage. Exiting on the east side of main floor, patrolled by two guards, the stairs to the west can be taken to procure the Thermal Goggles, while avoiding the cameras along the way.
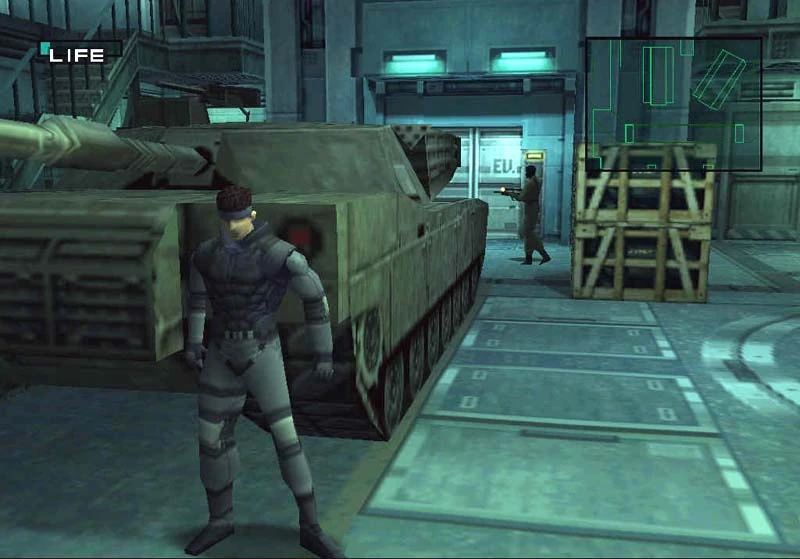
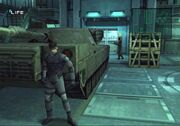
Two M1 Abrams tanks can be seen stationed on the main floor of the hangar. Call the elevator to the north and select the first floor basement (B1).
Weapons[]
- SOCOM pistol - east on upper walkway, inside Lv. 4 room (door unlocked) (if pistol was not procured from the heliport);
- SOCOM bullets x25 - northwest, beneath stairs (if pistol was procured from the truck);
- Chaff Grenades x3 - northwest on upper walkway.
Items[]
- Ration #1 - inside lower duct, northwest (take first left turn upon entering and follow duct to end);
- Ration #2 - inside upper duct, northeast (located after open vent cover at end of duct);
- Thermal Goggles - east on upper walkway, inside Lv. 4 room (door unlocked) (if pistol was procured from the heliport).
Tank hangar (B1) - holding cells[]
Goal: Rescue the DARPA Chief.
The Soliton Radar will display a green dot to the east, representing the position of the DARPA Chief. Pressing against the wall west of the elevator will reveal the Chief himself inside a prison cell. With no Lv. 1 card to access the cells, use the ladder to the southeast, and crawl into the open vent shaft.
Follow the duct, taking a left turn should SOCOM bullets be required (if the pistol was procured earlier). Using First Person View to look down into the grates will reveal the guard on duty, Johnny Sasaki. Proceed to the end of the main duct, where an imprisoned Meryl Silverburgh can be seen down another grate, before reaching the position above the DARPA Chief's cell. After the DARPA Chief dies, Meryl will escape her cell and knock the guard unconscious, before opening the Chief's cell. Before exiting, pick up the ration beneath the bed if necessary.
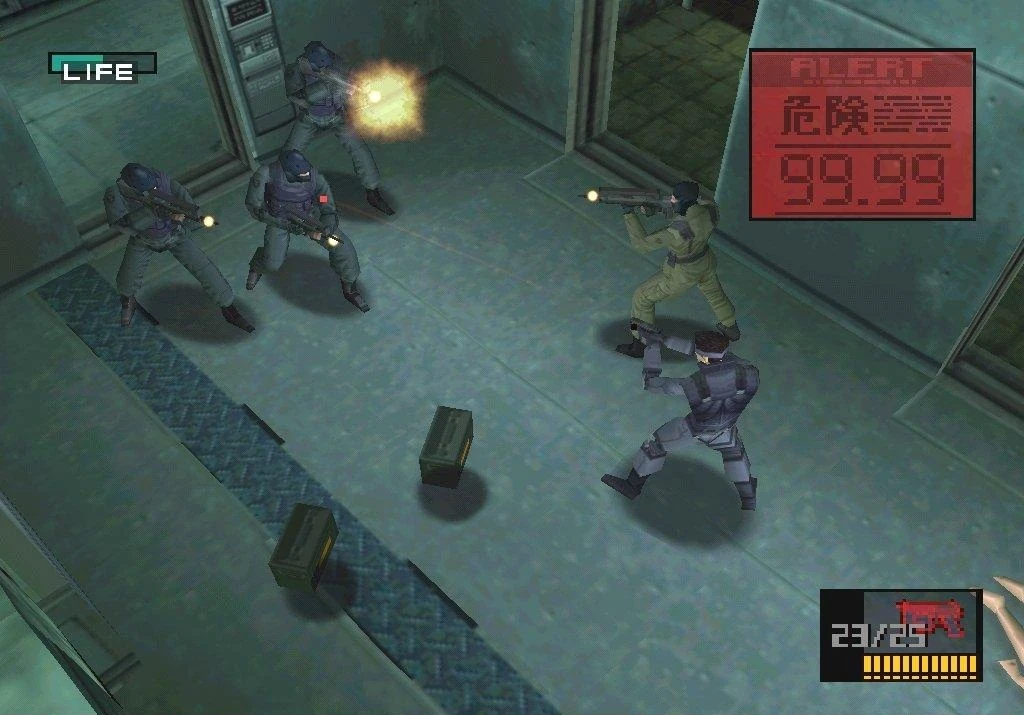
Meanwhile, a group of guards will gather outside the cell area and proceed to attack Snake and Meryl.
BOSS: Heavily armed Genome Soldiers[]

Genome Soldiers attack Snake and Meryl.
The soldiers attack in waves of three, which Meryl will help to defeat. The first wave of soldiers must be killed by Snake himself, since Meryl will initially refuse to fire. After a couple of waves they will throw in some grenades, which can be avoided by hiding in the corners by the door.
After the fight head south from the cells to procure more SOCOM bullets. Then use the elevator to the north and select the second floor basement (B2).
Weapons[]
- SOCOM pistol - inside cell area (if pistol was not procured from the heliport or tank hangar 1F);
- SOCOM bullets x12 - inside cell area, southwest;
- SOCOM bullets x12 - inside bathroom of cell area, southeast.
Items[]
- Ration #1 - floor level duct near ladder, southeast;
- Ration #2 - underneath bed in DARPA Chief's cell.
Tank hangar (B2) - armory[]
Goal: Locate the hidden entrances.
The floor of the armory has several trap doors, located between the northern storage rooms. Falling in will result in an instant Game Over. However, they can easily be seen with the thermal goggles. If the goggles have not been procured, the traps can still be avoided should Snake move quick enough, as they will emit an audible sound shortly before opening.
Enter the north center room, using the Lv.1 card, to pick up C4 plastic explosives. To reach the second hostage, Kenneth Baker, use the C4 to blow a path through a series of walls where the entrances used to be. Having been cemented over, but not painted, search for areas of the walls that are a different color, using First Person View. As no guards are currently present, the Alert Mode will not be raised upon detonating the C4. The location to blast is located on the south wall, at the southwest corner. There are also several hidden rooms that can be accessed in the same way, which contain additional items and ammo.
Weapons[]
- C4 x2 (2) - inside Lv. 1 storage room (B2-B), north center;
- Grenades x4 (2) - inside open storage room (B2-D), southwest;
- SOCOM bullets x12 (2) - inside Lv. 1 storage room (B2-E), south center.
- SOCOM bullets x12 (2) - inside hidden storage room (B2-H), northeast (blast through with C4);
- C4 x2 - inside hidden storage room (B2-H), northeast (blast through with C4);
- Chaff Grenades x3 - inside hidden storage room (B2-G), northwest (blast through with C4);
- Stun Grenades x3 - inside hidden storage room (B2-G), northwest (blast through with C4).
Tank hangar (B2) - armory south[]
Goal: Rescue the Armstech President.
In the south area of the armory, electronic jamming will render the Soliton Radar inoperable. Head south and destroy the discolored section of the east wall with C4. Proceed east, then blow the north wall to gain access to Baker's location.
- Before entering, it is possible to blast through another wall to the east, into an area guarded by two gun cameras; either use Chaff or First Person View to avoid their sights. Though there are only two C4 explosives that can be procured here, there are also Lv.4 and Lv.6 doors that can be accessed later in the game.
BOSS: Revolver Ocelot[]


.jpeg)
Revolver Ocelot, armed with the Colt Single Action Army.
Inside the next room, Snake will find Baker tied to a steel support column, rigged with C4 trip wires. Snake then encounters FOXHOUND member Revolver Ocelot, and is forced into a gun duel.
Since the center of the room is inaccessible due to the tripwires, Snake will have to either shoot at Ocelot from a distance, or get in close while he stops to manually reload his SAA revolver. The bullet meter displayed at the top of the screen will show how many bullets Ocelot has remaining until he reloads. He will run if Snake gets too close, but seize these chances to get in a shot or two. Be careful to avoid hitting Baker himself.
Other than that, the battle essentially consists of chasing Ocelot around the room, either clockwise or counterclockwise. Make good use of ![]() +
+![]() to allow Snake to shoot while running; standing still and taking cover will expose Snake to Ocelot's ricocheting bullets. If it is too difficult to aim at Ocelot while running, it is possible to punch him, even if he is shooting, making the fight a little easier.
to allow Snake to shoot while running; standing still and taking cover will expose Snake to Ocelot's ricocheting bullets. If it is too difficult to aim at Ocelot while running, it is possible to punch him, even if he is shooting, making the fight a little easier.
It is also possible to use any remaining C4 that may be left over from blowing through the walls. However, they can only be placed on the walls, as placing them on the floor will trip the wires and kill Baker (which will result in a Game Over). Press against the wall and place some C4, then detonate it as Ocelot runs past for a large amount of damage on his part.
Snake later speaks with Baker, who gives him the Lv.2 security card, and informs him that Meryl Silverburgh possesses the card keys for disabling Metal Gear. Her Codec frequency is written on the back of the game's CD case - 140.15.
Weapons[]
- SOCOM bullets x12 (3) - gun duel area, northwest, northeast, and northeast beside a tripwire;
- C4 x2 - northeast, inside hidden area to the east (blast through with C4).
Tank hangar (B2) - armory[]
Goal: Contact Meryl Silverburgh.
After returning to the north part of the armory, to escape the electronic jamming, contact Meryl by Codec. She will then prepare to unlock the cargo door located on the first floor for Snake to pass through.
Watch out for the heavily armed troops that are now patrolling the area. Procure the FAMAS rifle from the southeast storage room, using the Lv.2 card, while avoiding the infrared beams that have been set up inside. The beams can be made visible with either cigarette smoke or the infrared goggles. Head north to the elevator, then take it up to the first floor.
Weapons[]
- FAMAS rifle, with 26 bullets - southeast, inside Lv. 2 storage room (B2-F);
- FAMAS bullets x25 (2) - southeast, inside Lv. 2 storage room (B2-F).
Tank hangar (1)[]
Goal: Head through the opened cargo door.
After reaching the first floor, Meryl will inform Snake that the cargo door has now been unlocked.
Before passing through, travel to the east storage room to procure a suppressor for the SOCOM pistol. The guard inside will be facing away from the door and will occasionally fall asleep. Either break his neck or take the suppressor quickly while he is sleeping.
Using the recently acquired security cards, head up the stairs to the west, and clear out the now accessible storage rooms. Cardboard Box A is located in the west room, while a Mine Detector is located in the northeast room. A guard will patrol the upper walkway, so avoid making footstep noises on the walkway's floor grating, by crawling.
On the lower floor, head northwest through the opened cargo door. Immediately equip the thermal goggles or cigarettes to avoid the IR beams. Tripping a beam will cause the door to seal shut and nerve gas will fill the room, resulting in a Game Over. After avoiding the beams, head outside to the Canyon.
Weapons[]
- Chaff Grenades x3 - northwest, inside Lv.1 storage room on upper walkway.
Items[]
- SOCOM Suppressor - northeast, inside Lv.1 storage room;
- Cardboard Box A - northwest, inside Lv.1 storage room on upper walkway;
- Mine Detector - northeast, inside Lv.2 storage room on upper walkway.
Canyon[]
Goal: Head to the nuclear warhead storage building.

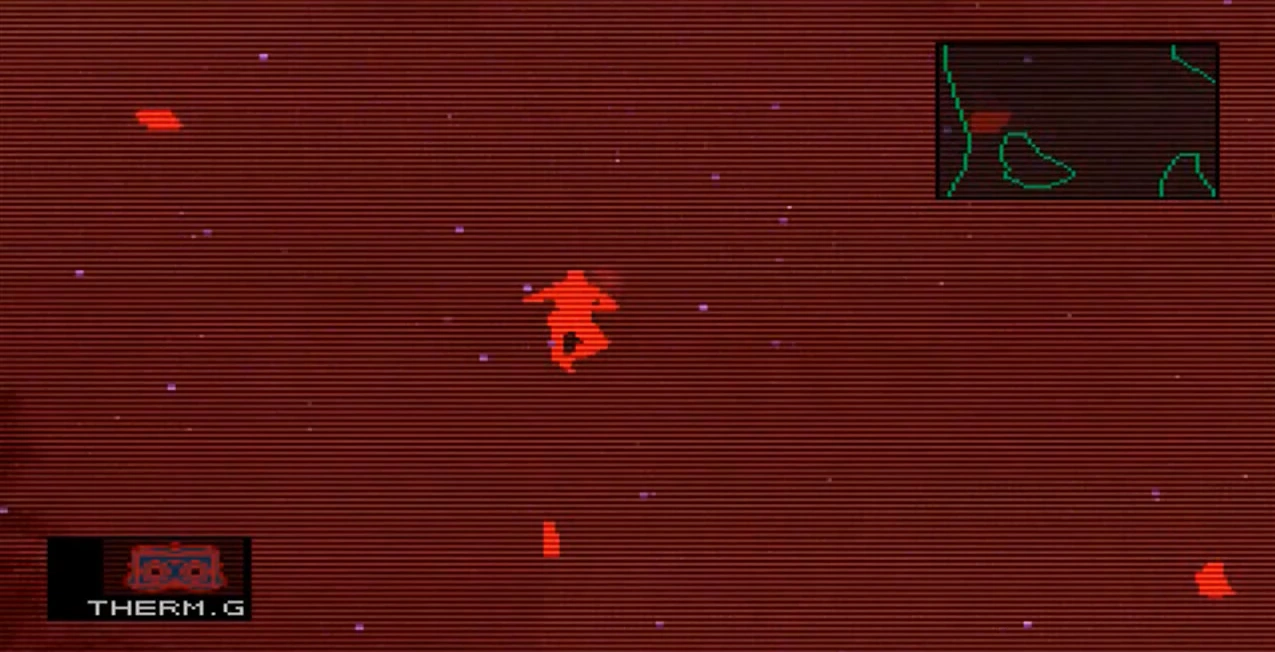
IR Goggles will display any Claymore mines in the Snowfield.
After entering the Canyon, Snake will receive a Codec call from the mysterious Deepthroat, warning him that Claymore mines have been set in the area. Equip the Mine Detector (or Thermal Goggles) to see the mines, which can be picked up by crawling over them. After passing the mines continue heading north.
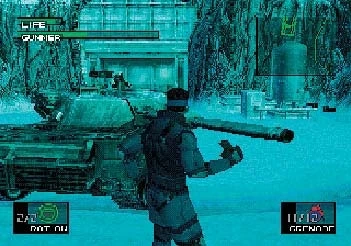
BOSS: M1 tank[]
A tank, commanded by Vulcan Raven, will then attempt to halt Snake's progress. To defeat the tank, there are two gunners that must be eliminated. The tank's Life Gauge is that of both gunners.
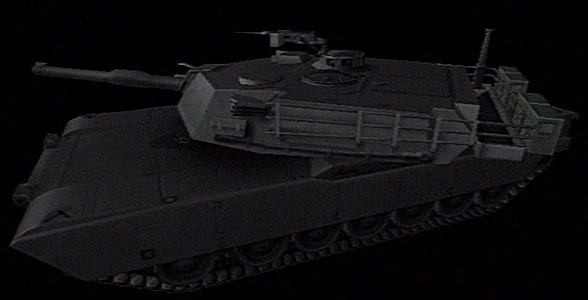

M1 Abrams
When the battle starts, use a Chaff Grenade before moving from cover. The tank's electronic sensors will then be disabled and its primary weapon (the main cannon) will be unable to target Snake. Raven will only fire the cannon when Snake is far away from the tank so it is recommended to stay close to it for the entire battle. Simply use more Chaff to avoid the cannon if forced to move away while procuring more grenades.
When close enough, use Grenades to damage the tank, throwing them as close to the gunner's hatch as possible. If the tank is moving around too much to make a clear throw, Claymore mines (or, alternatively, C4) can be placed in front of (or under) the tank's treads to damage them, slowing its movement considerably, to a snail's pace when damaged significantly. The machinegun can be avoided by running circles around the tank.
After defeating the tank, Solid Snake retrieves the Level 3 security card from one of the dead gunners and proceeds to the nuclear warhead storage building.

Grenades should be used against the M1 tank.
Weapons[]
- Claymores x5 - centre south (4), southwest, on west side of northernmost rocky structure (1);
- Chaff Grenades x3 - centre west, on north side of western column structure;
- Chaff Grenades x3 - northeast, on east side of northern piping equipment;
- Grenades x4 - centre east, on north side of eastern column structure;
- Grenades x4 - northeast, near northern piping equipment;
- Grenades x4 - northwest, past western column structure;
- Grenades x4 - northwest, on west side of door to warhead storage building.
Items[]
- Ration #1 - southwest, on west side of northernmost rocky structure;
- Ration #2 - centre west, on south side of western column structure;
- Ration #3 - northeast, behind northern piping equipment.
| Previous Location | n/a |
| Next Location | Nuclear warhead storage building |