| Line 232: | Line 232: | ||
[[File:Volgin.jpg|thumb|Colonel Volgin.]] |
[[File:Volgin.jpg|thumb|Colonel Volgin.]] |
||
| − | In one attack, he raises both his hands over his head with electricity between them. When you see this, immediately drop to the ground. The attack consists of Volgin firing bullets around him, capable of reaching you even if you stand behind him. If you lie down, you'll avoid this attack completely. |
+ | In one attack, he raises both his hands over his head with electricity between them. When you see this, immediately drop to the ground. The attack consists of Volgin firing bullets around him, capable of reaching you even if you stand behind him. If you lie down, you'll avoid this attack completely. This attack is also the starting attack he uses in the start of the second phase. |
Another one of his standard attacks involved him "charging up" one hand, (i.e. raising it over his head) and then firing shots after you, normally very low along the floor. If you are hit by this, it will result in a serious injury. The best way to avoid this is basically just maneuvering around him. Don't try to roll, even though you immediately gain a little momentum, Snake will take some time regaining his posture after this, and you will most likely be hit. |
Another one of his standard attacks involved him "charging up" one hand, (i.e. raising it over his head) and then firing shots after you, normally very low along the floor. If you are hit by this, it will result in a serious injury. The best way to avoid this is basically just maneuvering around him. Don't try to roll, even though you immediately gain a little momentum, Snake will take some time regaining his posture after this, and you will most likely be hit. |
||
| Line 240: | Line 240: | ||
Volgin also has the ability to create electric beams which run across the platform you are fighting on. To avoid these, simply roll over them. |
Volgin also has the ability to create electric beams which run across the platform you are fighting on. To avoid these, simply roll over them. |
||
| − | He can also attack you with hand-to-hand combat, which can be avoided by running and rolling. If he manages to connect, the damage is devastating, and you'll be sent up in the air before coming down, and vomiting before you can resume the match. |
+ | He can also attack you with hand-to-hand combat, which can be avoided by running and rolling. If he manages to connect, the damage is devastating, and you'll be sent up in the air before coming down, and vomiting before you can resume the match. These blows also run the risk of causing broken bones. |
No matter if you're going for a no-kill defeat or trying to kill him, his back is always unguarded, and is the place you should attack vigorously. Maneuver around him during his attacks (he usually is stationary during these attacks)You can also hit him while he is knocked down, he won't have his "shield" during this time. |
No matter if you're going for a no-kill defeat or trying to kill him, his back is always unguarded, and is the place you should attack vigorously. Maneuver around him during his attacks (he usually is stationary during these attacks)You can also hit him while he is knocked down, he won't have his "shield" during this time. |
||
Revision as of 00:31, 22 December 2014
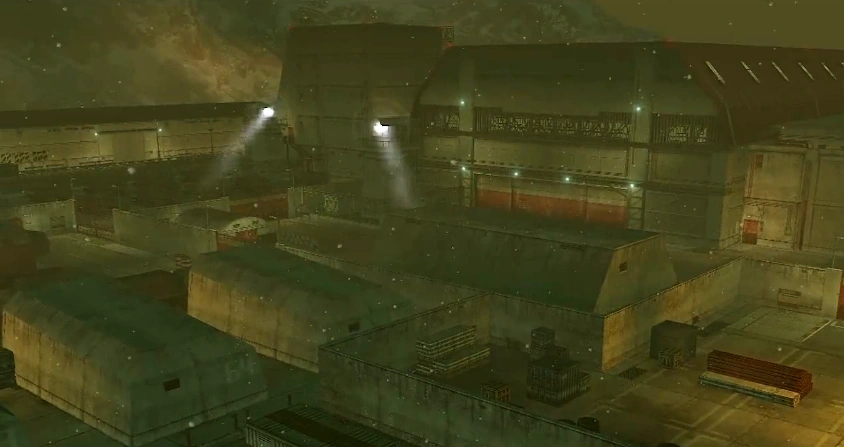
Groznyj Grad
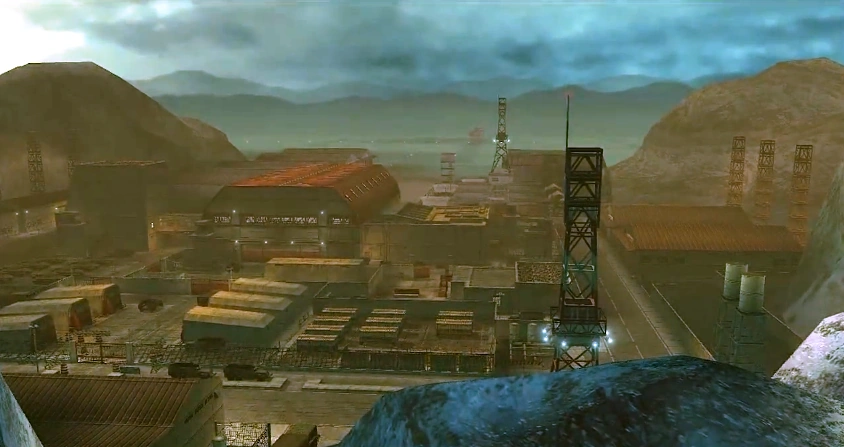
Groznyj Grad (Russian: Грозный град, "terrible fortress" or "terrible city") was a large military fortress located in Tselinoyarsk, USSR. The mountain stronghold of GRU colonel Yevgeny Borisovitch Volgin, it was here that Nikolai Stepanovich Sokolov was forced to complete the nuclear-armed Shagohod.
History
Construction
Groznyj Grad was created through Volgin's use of the Philosophers' Legacy. The center of the stronghold contained a weapons lab; the Hind prototypes as well as the flying platforms were developed at this location. To the northeast was a provisions storehouse containing supplies for the base and its personnel, as well as various mini hangars and some BTR-152s parked. To the southeast was a prison and torture chamber that dissident personnel and intruders were placed in. To the southwest was what was presumably a cargo storage area with various large crates in rows, the area also containing some MAZ-535 later production heavy transport trucks, as well as several large-scale hangars. To the northeast was a large portion of the base's weapons lab (more specifically the East Wing and the main hangar sections), as well as a provisions storehouse. To the northwest was an armory containing weapons of both Soviet and Western origin, as well as a parking area for the Objekt 279s, as well as devices that were presumably fuel tanks. Below the northwest section of Groznyj Grad was a sewer system that also led directly to a waterfall, which itself led to a river that flows through Tikhogornyj, as well as a secret passageway below the Objekt 279 parking area that led to a waterfall cave in Tikhogornyj. There was also a door in close proximity to the waterfall area in the former underground area that led to the outside of the fortress.[1] Should the base be placed on Red Alert, particularly regarding a prisoner escape, the sewers entrances and exits, save for the waterfall area, end up being sealed shut. Also, Groznyj Grad contained at least two underground vaults, one containing the Philosophers' Legacy, and the other containing weapons of Western origin used for research purposes. In addition, there are large buildings to the south, east and west portions of the base that presumably were for storage or communications purposes, due to radio towers being positioned in close proximity as well as at least one truck being parked in the south. Around the southeast perimeter were some water containers. To the north of the weapons lab is the barracks section,[2] which contained various large hangars (approximately six, four westward and two eastward), storage tents/small storage buildings, oil drums, forklifts, a watch tower and at least one radio building, within the western and eastern sides, respectively. A smaller hangar as well as an armory was also located near the larger hangars just beyond the West Wing/Main Wing glass bridge. In the Southwest area was a hatch that led to an underground passage linking Groznyj Grad with Krasnogorje. The passage acted as an underground air-raid shelter for the personnel of Groznyj Grad and Tselinoyarsk in case Tselinoyarsk was ever attacked by an air-raid.[3]
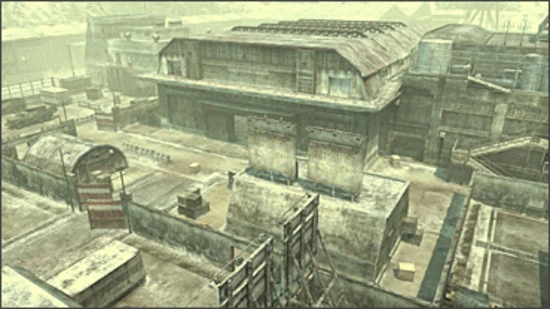
The Main Wing of Groznyj Grad.
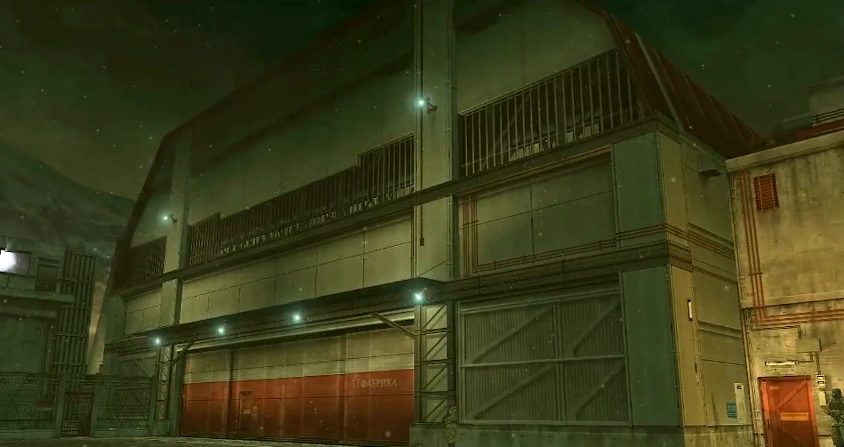
The weapons lab was divided into three parts: The East Wing, the main building, and the West Wing. The East Wing was where the research facilities are located. The Main Building was where Groznyj Grad's weapons and war machines are developed, and the West Wing, which was technically separated from the actual weapons lab save for a glass bridge/passageway, was where researchers of high importance are held. The West Wing, because of this, was also restricted to all save for personnel with the rank of Colonel, although exemptions were made for personnel who either acted as lovers towards the base's commander, Volgin,[4] or for their relation to the legendary Cobra Unit.[5] Trucks also traversed in and out of the base, presumably to transport supplies. The base's weapons lab's East Wing contained a library, which was frequently visited by GRU major Ivan Raidenovitch Raikov, some storage rooms/pantries (one of which was locked both ways by a frequency based-lock that can only be opened by Major Raikov or the other guards due to circuitry within their uniforms, or a specific radio frequency per door), a restroom, and a break room/locker room at the southwestern side of the second floor in addition to the research facilities (themselves located on the second floor). Because officers are not allowed to use radios while indoors, alarm systems are also installed and triggered by personnel if an intruder is detected.[6] Medical herbs from Tselinoyarsk were also grown within the main lobby, presumably as a way to maintain medical supplies. The West Wing contained the entry room, two unnamed rooms to the left and right, and the holding area in front. The main building contained several supercomputers, as well as cargo elevators for bringing up equipment, and was three stories tall. On both sides of the weapons lab are searchlight towers. The base also contained a runway for the liftoff of several aircraft north of it, with the storage/hangar areas north the weapons lab leading directly to the road leading to the hangar, and was originally going to be used in the Shagohod's first test. The runway had various watchtowers. Because of its high altitude and close proximity to Krasnogorje (which acted as a natural barrier), Groznyj Grad often experienced snowfall.[7]
To the north of the main Groznyj Grad base/airfield is a rail bridge that is used as the primary entrance to Groznyj Grad for personnel, as it is separated by a large river within a canyon. It is identifiable from a building near the entrance/exit that was presumably a check-in booth as well as a pair of watchtowers on either side of the entry way and two buildings below it. Beyond the rail bridge is a minor base that presumably acts as the main gate towards Groznyj Grad that is enclosed with a fence as well as a gate. Two large radio towers are also present, as well as a provisions building, a water tower, and other large buildings. This area also has at least one ZU-23 turret as well as a DShK turret, and some sandbags. To the north of the rail bridge is a winding path, with two buildings high on two different sections of a cliff wall as well as a watchtower that eventually leads to Lazorevo, the watch tower also being near Lazorevo's entrance.
The various MAZ-535s on the base premises had been utilized for delivering various supplies throughout the base as well as the entire region. Because of the immense size of the base alone making loading, unloading and delivering various supplies a very daunting task, the various Groznyj Grad personnel usually cannot afford to take the time to thoroughly inspect the contents of each cardboard box that was on the truck.[8]
Operation Snake Eater
- See also: Virtuous Mission and Operation Snake Eater
During Operation Snake Eater, Volgin tortured and murdered Aleksandr Leonovitch Granin thinking he was the spy helping Naked Snake. He discovered a tracer in his shoes, meaning that even if Granin wasn't the spy, there was indeed a spy within their ranks. The Boss also told Volgin that The Fear and The End were both dead, and that Naked Snake may have been arriving to steal the Philosophers' Legacy. Naked Snake used an underground tunnel from Krasnogorje (the underground air-raid shelter) to first enter the base, where he encountered the Cobra Unit's Flame Soldier, The Fury. After defeating him, a section of the tunnel caved in, preventing Snake from backtracking the way he had come. Air raid sirens were also heard blaring throughout the base, most likely due to Khrushchev's forces attempting to enter Groznyj Grad. After arriving and avoiding the guards, Snake located Major Raikov and knocked him out, stealing his uniform and locking him up in a locker. Afterwards, Snake went over to the West Wing of the weapons lab and attempted to rescue Sokolov. However, his plan backfired when Volgin realized that Snake wasn't Raikov and were both captured. Snake managed to escape, having to take the sewers after the original escape route that EVA provided was cut off by Volgin's forces after Volgin discovered Snake's escape and placed the base on red alert which resulted in the sewers being sealed off.
The Shagohod's hangar within Groznyj Grad.
Afterwards, Snake returned to Groznyj Grad, and thanks to the Shagohod's completion, the actual design area of the weapon was left heavily unguarded: personnel called for a day of rest due to Volgin's refusal to let the engineers and scientists rest while working on it, resulting in a mass amount of exhaustion. Two GRU soldiers were also conducting a drill involving one soldier running back and forth, and the other giving commands of "Move!" and "On the double!", firing up in the air with his machine gun when giving the latter command. Snake successfully planted C3 explosives, supplied by EVA, on the fuel tanks intended for the Shagohod, but he was discovered and captured as he attempted to leave. A fight ensued between Snake and Volgin, with the former emerging victorious, just as the GRU soldiers began evacuating the facility. Snake met with EVA ouside, who arrived on her motorcycle with a sidecar, and the two used it to make their escape, as the hangar exploded behind them. However, the EOD had removed all the fuel from the tanks earlier, so the explosion only took out the assembly line. The Shagohod was unscathed by the blast, and emerged from the smoldering hangar with Volgin at the controls.
WIG parked in the middle of the runway, with the turn towards the rail bridge seen nearby.
Volgin went on a rampage, tearing through Groznyj Grad in the Shagohod, in pursuit of Snake and EVA, without regard for any of his troops or his base. They eventually decided to lure Volgin and the Shagohod onto the rail bridge (which was rigged by EVA with C3 earlier) and then detonate it while he is on it, before being chased by Ocelot through the burning remains of the weapons lab main wing. Eventually, the two spies reached the main runway, evading GRU soldiers on motorcycles, as well as the Shagohod. As they headed for the nearby rail bridge, Volgin plowed through the parked WIG aircraft before activating the Shagohod's rocket engines, running over various GRU bike drivers in the process, but eventually crashed into a fence. EVA and Snake lured him to the bridge, which had been rigged with explosives earlier, in the hopes of taking out the Shagohod with it. The bridge explosives were set off, and it collapsed as the "Treading Behemoth" attempted to cross it. After EVA and Snake fought against a heavily damaged Shagohod and defeated the Shagohod and Volgin for good, EVA and Snake were then pursued down the mountain path north of what remained of Groznyj Grad's rail bridge, until they were ambushed by GRU forces manning motorbikes and BTR-152s, resulting in them diverting to Lazorevo.
Groznyj Grad was later destroyed by The Boss in a nuclear explosion, just before she fought against Naked Snake at Rokovoj Bereg, using a Davy Crockett missile. Later, Ocelot reported the incident to the Director of the KGB, who disapproved of the fortress and research lab's destruction, with Ocelot replying that "they were necessary sacrifices."
Behind the scenes
Groznyj Grad, as it is seen in Metal Gear Online.
Although Groznyj Grad is located in Russia, the "Stop" signs painted on the roads are Serbian. There is a similarly named city in Russia known as Grozny, which serves as the capital city of the Chechen Republic. Since the fall of the Soviet Union, Grozny has been the scene of numerous vicious battles between the Russian Army and Chechen separatists. The word Grozny means "fearsome", "awesome" or, as was the case with the first formally crowned Tsar of Russia, "terrible." Grad comes from the Proto-Slavic word gordÑŠ which was used to refer to fortified settlements. Grad or gorod is now used to refer to cities, and has been used in a number of Russian city names such as Volgograd (formerly Stalingrad) and Leningrad, (formerly Petrograd), now called Saint Petersburg.
The two Soviet officers that guard Groznyj Grad's West Wing in Metal Gear Solid 3: Snake Eater disappear after letting Snake in. They are not seen in the cutscenes that show EVA and The Boss leaving the West Wing.
According to a director's commentary by Hideo Kojima, the scene layout of Snake's first arrival at Groznyj Grad was intended to imitate the first generation of Metal Gear Solid.[9] In addition, when Snake was scouting the base at the Krasnogorje vista via his binoculars before witnessing Volgin torturing Granin to death, it was originally intended that, besides the guards and tanks parked in rows, he also scout the jeeps, military trucks, and armored cars parked in rows, the runway with a parked WIG, and a fenced-off area containing various soldiers and scientists. These were removed in the final version.[10]
Snake's escape from the prison area of Groznyj Grad via the sewers is a reference of The Fugitive, starring Harrison Ford and Tommy Lee Jones.
Return of the Living Apes.
Groznyj Grad's main Weapons Lab hangar is reused in the Snake vs. Monkey level Return of the Living Apes, exclusive to Metal Gear Solid 3: Subsistence, with the Shagohod being replaced with Mesal Gear. In addition, the Big Boss-esque monkey makes a reappearance.
The assembly plant on the San Hieronymo Peninsula, featured in Metal Gear Solid: Portable Ops, heavily resembles Groznyj Grad.
Groznyj Grad was remade for Metal Gear Online using Metal Gear Solid 4: Guns of the Patriots' graphics engine. It was made slightly smaller, however, and given a run-down and more dilapidated (i.e. post-Soviet) look. On a related note, Groznyj Grad is the only online map based directly on a level from Metal Gear Solid 3, Portable Ops, or Metal Gear Solid 4 to retain its name, due to the other names being changed for alliterative purposes.
In the intro of Metal Gear Solid: Peace Walker, Groznyj Grad was misspelled as "Groznjy Grad."
Walkthrough
Underground Tunnel
Krasnogorje/Groznyj Grad underground tunnel
Prior to reaching the fortress proper, Snake must pass through the underground tunnel, leading from Krasnogorje. Run down the stairs and follow the path. Be wary of bats in the darkness. When you get to the open walkway, you can reach the items behind the barrels by swinging over the railing and shuffling along. Once you are properly prepared, follow the walkway to the ladder and descend.
Boss: The Fury
The Fury is most dangerous when you get in front of him. Never under any circumstances engage him in a front-on attack, as his flamethrower will prevent you even getting close. Because of this, the best approach for the battle is a "Run and Gun" approach, though, if going for a stamina kill, rolling into him can be surprisingly effective here.
The Fury
When the battle begins, run directly south and hide in the centre of the passage behind the pillar. You can knock on the pillar to attract The Fury to your position; whichever way he comes, stalk round the other way and shoot him from behind (either three times with the MK22 or once with the M37; the latter is your weapon of choice for most of this battle if going for a lethal kill). If you're going for a stamina kill, the Mosin-Nagant seems to be more effective than the Mk22.
Immediately after knocking him down, get a pillar between him and Snake, so as to protect from his flamethrower. Use the direction of the flames to figure out which way The Fury is looking and run to him from behind either rolling into him or shooting him again (the former for non-lethal, the latter for lethal).
You can repeat this process indefinitely. Use the directional microphone, or another sensor to determine his position, lure him to you, and then get behind him. You can even occasionally hit him several times in succession before he flies off by running behind him WHILST he is using his flamethrower.
If going for a lethal defeat, the survival knife can be useful from behind - not only will it inflict a lot of damage if done correctly, but it will also cut his astro-suit open, making him more vulnerable to other types of damage. Remember you can also use the environment to your advantage; shooting the barrels will make them explode, and you can also shoot the pipes to extinguish any lasting flames. If you do catch on fire, either roll a couple of times or switch your camouflage. On the topic of camouflages, black camouflage (or any other dark-colored uniform) is most effective in this fight. Though obviously, if you have previously unlocked the Fire camo, use it.
The Fire camo is the reward for defeating The Fury non-lethally. It is completely resistant to fire (though note that you can still be hurt from the force of any fire attack).
When Snake exits the area, it is nighttime, and several searchlights scan the area. There are attack dogs and numerous guards patrolling.
Equipment
Pre-battle
- Grenades
- M37 Bullets x16
- M1911A1 Bullets x21
- XM16E1 Bullets x80
- Bandage
- Antidote
- Mk22 Bullets x24
- AK-47 Bullets x120
- Battery
Battle
- SVD Bullets x120
- M1911A1 Bullets x21
- Mk22 Bullets x 24
- AK-47 Bullets x120
- XM16E1 Bullets x 80
- Grenades
Post-battle
- Bandage
- Mk22 Bullets x 24
- Disinfectant
- Ointment
- Fire Camouflage (non-lethal kill only)
Southwest
The exterior of Groznyj Grad is divided into southwest, southeast, northwest, and northeast sections. The southwest section is where Snake first emerges. The southeast section contains the jail/torture rooms. The northeast section contains a provisions storehouse and the entrance to weapons lab. And the northwest section contains an armory and sewer entrances.
After climbing the ladder from the underground tunnel, Snake will enter the southwest section of Groznyj Grad. Head up the steps and run north. Crawl under the crates to the northernmost one. Either tranquilize the two guards, or wait until neither of them are on the northern path and run. At the turning, dispatch the guard just round the corner and then run, without hesitation, to the north door.
Equipment
- XM16E1 Bullets x80 (2)
- M1911A1 Bullets x21
- Styptic
- Chaff Grenades
- Smoke Grenades
- Mk22 Bullets x24
- Disinfectant
- M1911A1 Suppressor
- Grenades
- SVD Bullets x40
- Bandage
Northeast
Once through the door, run immediately right and peek round the corner. A guard will be walking away from you. He would probably have gone too far north for you not to be seen, so wait until he patrols north and then comes back south again. Once he is back at the corner and has turned away, CQC him.
Crawl north to the end of the path and tranquilize the two guards patrolling by the door, starting with the one on the right. Note, however, that, upon tranquilizing the right guard, the left guard may notice and start a Caution alert. However, this actually makes it easier, as he will retreat to behind a crate to make his transmission to HQ, allowing you to run straight to the door unnoticed.
Equipment
- M1911A1 Bullets x21
- Book
- Cardboard Box C
Weapons Lab: East Wing

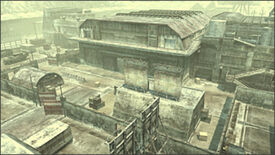
Groznyj Grad at nighttime
In this area, Snake must capture Major Raikov and steal his uniform to disguise himself and get clearance into the west wing.
In addition, a Scorpion submachine gun can be obtained in a locked room here. The doors can be unlocked with a frequency obtained by interrogating the officers in the building. Alternately, since the doors automatically open for the guards here, Snake can closely follow a guard into the room, drag an unconscious guard through the doorway, or enter the room himself while wearing Raikov's uniform. In addition to several guards looking out for intruders, there is also a large number of scientists working in the east wing, most of them on the second floor and another one at the library at the first floor. Raikov can be found often in the toilets as EVA describes him as having a weak stomach despite a large appetite.
- When Snake returns to the East Wing at daylight, he can obtain the Sneaking Suit in the locker Raikov was put, as well as the Maintenance Uniform to disguise as one of the workers at the hangar where the Shagohod is held.
Equipment
- Mk22 Suppressor
- XM16E1 Suppressor
- Bandage
- Suture Kit
- Ointment
- Antidote
- Book
- Russian Ration (2)
- Raikov uniform
- Maintenance Uniform
- Sneaking Suit
- Scorpion Sub-Machine Gun
Weapons Lab: West Wing
This high-security wing is accessible only to those who have Colonel class, and is where Sokolov is kept. Snake meets up with him here using the Raikov disguise and learns about Phase 2. However, Volgin shows up, and when he realizes "Raikov" is actually Snake, he beats him to a pulp. Make sure to pay attention during the next cutscene, as an R1 prompt will give you a radio frequency that can be used in the next sequence. If it is missed, there is another way to find out the frequency.
Torture Room
After being placed in a cell, Snake will possess no weapons or equipment, except for the revive pill implanted in his tooth. In the Cure menu, he will have two wounds - a transmitter and a fake death pill, both embedded in his body. To remove them, use the fork that is located in the cell. Leaving the transmitter inside him will cause an Ocelot unit to pursue him later on, in Tikhogornyj, but also triggers two cutscenes, one of which has a humorous tone. The fork can be used to spear and eat the rat in the cell, in order to recover some stamina. It can also be used as a lethal weapon, in the same manner as the survival knife, but CQC actions cannot be performed.
To escape from the cell there are three options:
- Firstly, the fake death pill can be used to fool the guard (Johnny) who will open the cell to investigate (it has the same effect to the ketchup from Metal Gear Solid).
- Secondly, the Cure menu can be used to rotate Snake's character model around several times, until he vomits. When he does so, the guard will enter the cell to make sure he is all right, but if Snake waits too long, he will realize it is a trick and the Alert phase will ensue. Make sure to incapacitate Johnny, either using hand-to-hand combat or the fork, before this happens.
- Thirdly, the radio can be used to contact frequency 144.75, which will open the door remotely. If the frequency was not discovered in the previous scene, it can be found by throwing three pieces of food back to the guard, which he initially gives to Snake. To show his thanks, he will show you a picture of his family in the cutscene that follows; the frequency can be seen written on the back by pressing R1. Afterwards, Snake will be rewarded with the Cig Gas-Spray, which can be used to knock Johnny unconscious. Another idea is to use the frequency when Johnny heads to the bathroom (due to stomach problems), allowing the player to escape without having to engage him.
Southeast
Once Snake has escaped, the player enters one of the most difficult portion of the game, due to lack of weapons, equipment, and camouflage, and timing is everything. Press up against the wall and go south to the corner of the building. The guard just round the corner should be looking in your direction. When he turns round, use the D-Pad to sneak behind him and to his right; once he passes the gap between the car and the wall, run south to the hole in the wall without pausing.
Equipment
- Fork
- Cardboard Box C
- Book
- Camera
- Disinfectant
- Styptic
- Ointment
- Bandage
- Suture Kit
Southwest
In Groznyj Grad SW, keep crawling until you are under the crate. Watch for when the two guards patrolling across the top row of the crates walk south into the crates, and then crawl out north and run west. Stop on the corner to check the guard is looking the other way and then go (sneak if he is too close) west again. Follow between the two bunkers and then north to the door (no one should see you).
Northeast
Groznyj Grad NE is easiest. Simply run west without stopping to the door. A guard may see you, but he won't trigger an alert if you don't stop running and stay close to the south wall. You are far from over, though, as Groznyj Grad NW is the most difficult one.
Northwest
Once through the door immediately run west and then south and then west again, following the wall and the corners round. Stop when you get to the corner of the railings and the south wall. Use First Person View to check north, and you should see a guard patrolling between the two rows of tanks, moving east. After a few seconds he will stop and turn north; when he does so wait 1 second (yes, ONE second) and then run north, U-turn around the railing, run south again, and then run west/north-west, cutting the corner if you want.
Go past the parked car to the first tank, go inside and get the ration (it's not for eating, you'll need it in a moment). Crawl straight out the way you came. If you time it right, the dog in the north-west should be waking up at that moment. Run north slightly to the second tank and then wait, positioning yourself where you can quickly crawl under the tank (though remain standing). The second you hear the alert sound of the dog seeing you, crawl under. You should hear the guard go "Huh?" about two seconds before reaching the styptic. If the guard's cry comes too late, wait for a second or two. Then crawl straight out the other side.
Stand up straight away and run north, curving slightly once you see the parked car by the green-blue crate. Crawl straight under the parked car and wait. Out the other side, you should see a guard strolling either north or south, and a dog either sleeping or standing. Wait for the guard to move in a southern direction until he is directly in front of the car. Then, crawl out the north side of the car. Run east ever so slightly so as to expose you from behind the crate and alert the guard to the north-east.
Go to the west side of the crate and wait for the guard to come close enough so that he won't see you if you emerge from behind it. When he does, go the northern side of the crate and throw the ration all the way over to the bottom of the stairs. The second it hits the ground, run directly towards. When you are inches away from picking it up (do not) turn north and run all the way to the open wire door. The dog, attracted by the meat, will ignore you completely. Crawl under the pipes and Snake will automatically descend to the sewers. Give yourself a pat on the back, especially if you completed the near impossible feat of doing that on your first try.
If you want, you may also attempt to make a break for the armory, located at the north end of the area. In the armory you can obtain an M63, allowing you to shoot your way through the next few areas if need be.
Equipment
- Disinfectant
- Bandage
- Styptic
- TNT
- M63
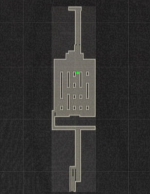
Sewers
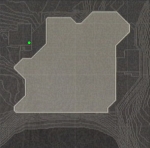
Sewers map.
Descend the steps to the main path. You can navigate left and right through crawlspaces. After following it north to the end, take a left and then a right. Go forward and dive into the water, emerging on the other side via the ladder. Drop down to the central pathway and notice the sets of steps on the right. Ascend one to the side on the right and crawl through the crawlspace at the far end. Once through it, take a left and you will notice, quite literally, a light at the end of the tunnel. Run towards it to trigger the cutscene.
Equipment
- Life Medicine
- Styptic
- Russian Ration (2)
- Instant Noodles
Weapons Lab: Main Wing
Key C
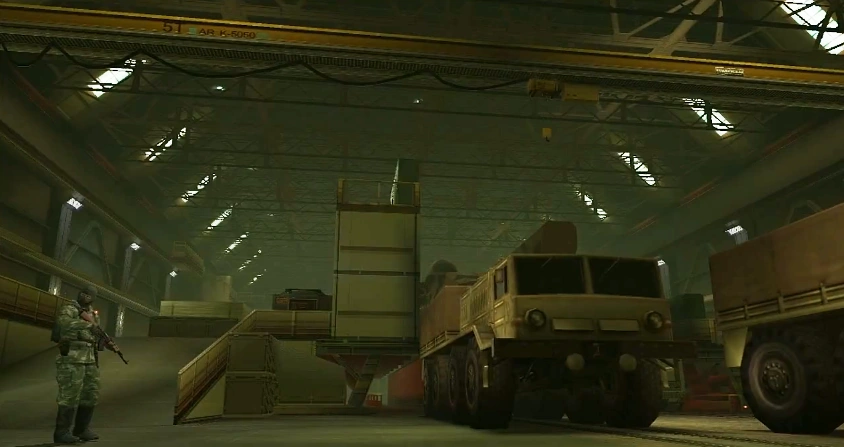
The central hangar where the Shagohod and the assembly line are located. After returning to Groznyj Grad, Snake must plant C3 explosives on the four fuel tanks to sabotage the system and destroy the hangar.
However, as he leaves after planting the last explosive, he is detained by Volgin and The Boss, who discovered EVA stealing the Philosophers' Legacy. As the timer counts down, Snake and Volgin battle it out on a lowered platform. During the battle, the explosives are discovered and EOD are called in as an evacuation is ordered.
Equipment
- Life Medicine
- Russian Ration
- Instant Noodles
- Cold War Camo
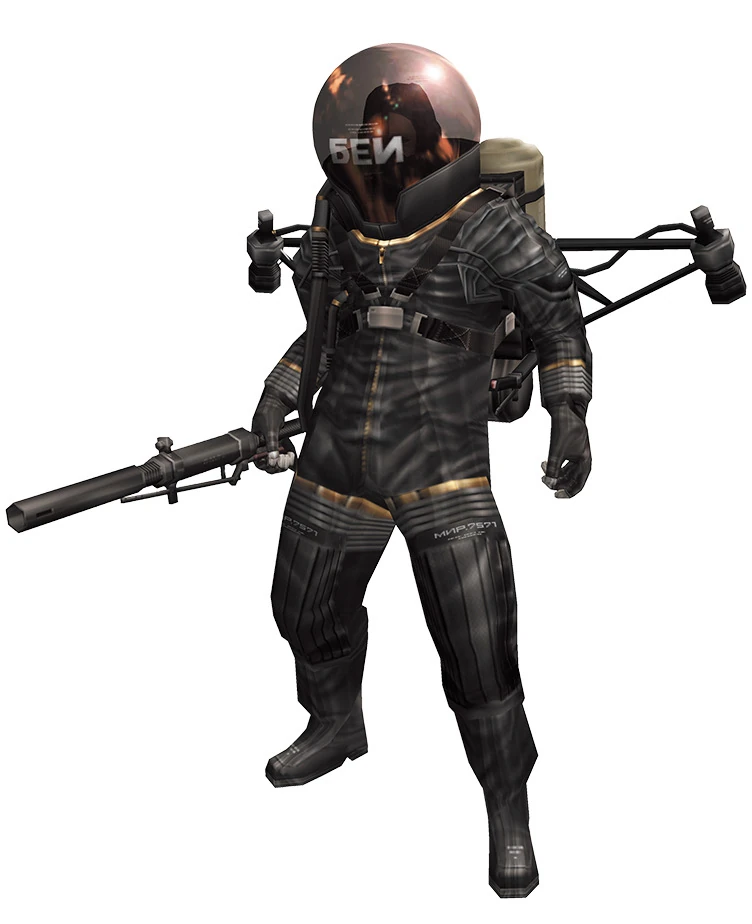
Boss: Colonel Volgin
General Strategies:
Volgin employs several shock attacks towards you during this match, which in any case should obviously be avoided. Visual clues indicate what kind of attack he is going to use, and this time should be used for evasive preparation.
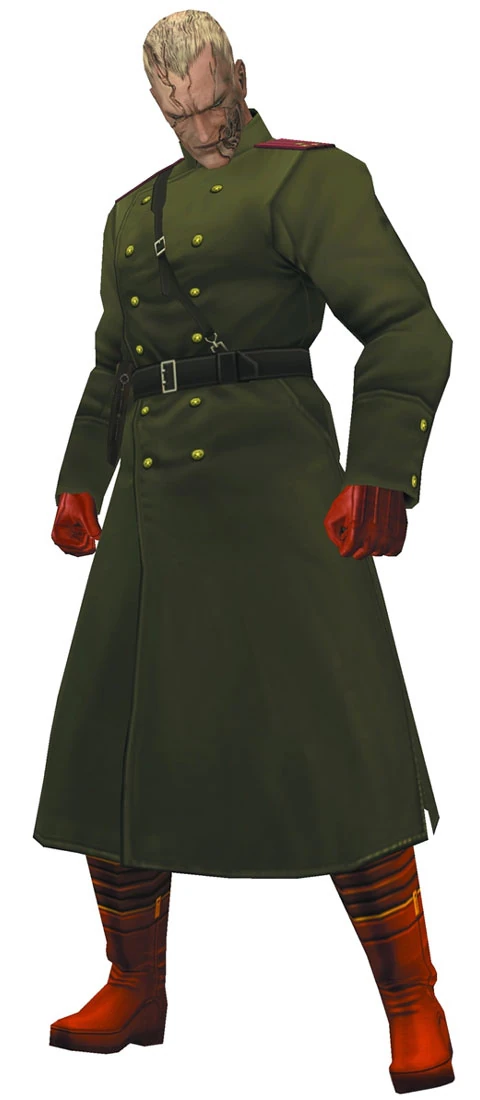

Colonel Volgin.
In one attack, he raises both his hands over his head with electricity between them. When you see this, immediately drop to the ground. The attack consists of Volgin firing bullets around him, capable of reaching you even if you stand behind him. If you lie down, you'll avoid this attack completely. This attack is also the starting attack he uses in the start of the second phase.
Another one of his standard attacks involved him "charging up" one hand, (i.e. raising it over his head) and then firing shots after you, normally very low along the floor. If you are hit by this, it will result in a serious injury. The best way to avoid this is basically just maneuvering around him. Don't try to roll, even though you immediately gain a little momentum, Snake will take some time regaining his posture after this, and you will most likely be hit.
He also employs "shock-beams" which he sends after you. Normally in one hand, but he can employ several at once. This attack "homes" after you if you have a weapon equipped, and if you are hit, the ammunition in the current magazine will detonate. If you see this attack coming, unequip your weapon immediately, and maneuver around it as you normally would. This attack cannot be avoided if you have a weapon equipped. This attack can be countered by dropping a glowcap anywhere in the arena (which causes it to target the glowcap instead of you), or by having a chaff grenade active (which disables the attack's homing altogether).
Volgin also has the ability to create electric beams which run across the platform you are fighting on. To avoid these, simply roll over them.
He can also attack you with hand-to-hand combat, which can be avoided by running and rolling. If he manages to connect, the damage is devastating, and you'll be sent up in the air before coming down, and vomiting before you can resume the match. These blows also run the risk of causing broken bones.
No matter if you're going for a no-kill defeat or trying to kill him, his back is always unguarded, and is the place you should attack vigorously. Maneuver around him during his attacks (he usually is stationary during these attacks)You can also hit him while he is knocked down, he won't have his "shield" during this time.
Regardless of the kill method, taking too long will have the the PA announcer come on and report that explosives have been detected in the hangar, as well as proceed to count down the estimated amount of time left before the C3 explodes.
Stamina kill:
Stamina Killing Volgin is actually the simplest way to deal with him, since you can combine firepower (albeit with tranquilizer weapons) together with CQC. The best way to approach this situation is using the Mk22, together with CQC. Hit him in the back when you have the chance, and when he doesn't have electricity visibly around him, run up and knock him down with CQC. This will damage him, and is your chance to get several shots off while he's down.
Another, perhaps more efficient way to stamina kill Volgin, is to make use of the SAA, CQC, Mk22, and in some cases, stun grenades. At the start of the fight, execute a CQC throwdown. While he is kneeling down on the floor, take out the SAA, and smack him around with it while he is on the floor. After that, roll over him for additional damage. You can also use the Mk22 instead of smacking him with the SAA, although this attack is slower and wastes ammo In the second half of the match, it is more difficult to do this method as he uses more attacks and has electricity around him more, but if you're patient, he will let his guard down at times. If you combine this method in the second half along with throwing stun grenades (if you have any) when he is not attacking you, you should be able to defeat him easily. You can also use the Cig-Spray or Handkerchief, although it is more dangerous since you must get very close to him, which can leave you open for Volgin's punches.
Regular kill:
Volgin can be taken down in the same way as stated above under the "Stamina Kill" section, but with lethal weapons. You could use the M1911A1 for this, or you could use a more powerful weapon such as the RPG-7 or M37. Hit him in the back, as stated above. CQC can also be used in the same way as under the "Stamina Kill" section, though the stamina bar-damage won't help you if you are trying to kill him.
A second strategy is to equip an automatic weapon e.g. the M63 or AK-47 and hammer away at him. After around 20 rounds his shield will fail for a second or so.
There is another strategy that allows you to easily end the first part of the boss fight. Take the fake death pill and make Volgin think Snake is dead, then take the revive pill and secretly sneak up to him. Equip the TNT and lay down as many charges possible (preferably in one place). Walk away and detonate the charges one by one.
Groznyj Grad
After beating Volgin, the Shagohod (being piloted by Volgin) will break free of the weapons lab, with EVA and Snake having to escape via motorcycle. The weapons all have infinite ammunition, meaning there's no need to worry about running out of ammo. Also, the only thing to worry about is firing weapons, meaning that there isn't any need to worry about also driving the vehicle. The starting point is just on the eastern side of what remains of Groznyj Grad's weapons lab. After looking back to see the Shagohod, EVA will drive to the front. Take out as many soldiers as possible. Afterwards, the Shagohod will arrive. EVA will then narrowly evade the Shagohod and drive through gates that were burst open, and evventually drive through the Southwest section. Take out the soldiers passing through and then head to the Northwest section and take out the soldiers present there, including some on the Main Wing/West Wing glass bridge. Eventually the Shagohod will arrive and smash the tanks and EVA will pass under the glass bridge, where a cutscene will play involving EVA making plans to blow up the bridge and lure the Shagohod towards the bridge as well as Ocelot chasing them. If the player managed to gain the Cold War camo beforehand, they won't have to fire on Snake, thus also making firing on them almost unnecessary.
Groznyj Grad Runway South
After the cutscene ends, EVA will arrive in this area and pass by a fence before heading northwards, turning west, and going past two buildings before backing up while taking out the soldiers nearby. When she does the latter action, take out the soldiers ahead of her. Afterwards, she'll go through the alleyway between the middle building and the eastern one and go there, uturn, go back the way she came, at which point, take out the pursuing soldiers. After this, EVA will then go past the western building and go northward and then head east, circle back, and circle forth, where she'll pass the eastward building and go through it, going under the gate of the final building onto the runway road.
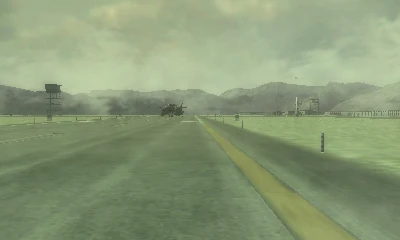
Groznyj Grad Runway

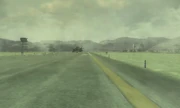
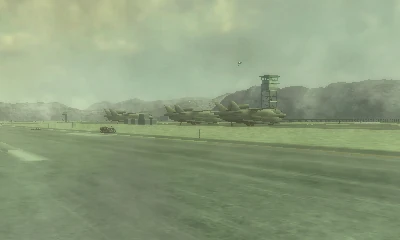
Groznyj Grad runway, 1964.
Afterwards, a cutscene will play where the Shagohod catches up with Snake and EVA, along with various motorbike riding GRU soldiers. Just keep firing at them while EVA turns left, or, if wearing the Cold War camo, just continue to face them. Eventually, a cutscene will play as they arrive at a WIG on the runway. Afterwards, equip the RPG-7 and start blasting at the Shagohod (and if not wearing the Cold War camo, blast the other soldiers as well). Although Volgin will claim that he isn't feeling a thing, the blast of the RPG-7's shell does at least slow him down by a few feet.
Groznyj Grad Rail Bridge
After a cutscene, Snake will use the SVD or the RPG-7 to blow up the C3 on the bridge. It requires timing to achieve this: Do it too soon, and the mission is failed because it was blown up before it got on. If it is too late, the mission is failed because the Shagohod got past the bridge. When EVA says "It's Here!", that's the cue to blow up the C3. Afterwards, a cutscene will play where the Shagohod will fall off the blown up bridge, only for the main pilot version to escape.
Boss: Volgin and the Shagohod
Groznyj Grad Rail Bridge North
After the motorcycle chase, the Shagohod survives the subsequent destruction of the rail bridge with the C3, although its entire back panel and rockets have now been torn off, making it vulnerable to attack from behind.
Stage 1 strategy

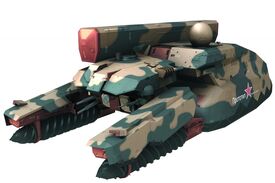
The Shagohod.
Use the RPG-7 to hit the "treads". This will lock them up and the motorbike can circle around to where the weak spot is. hit it with RPG-7 rounds, If you quick-reload you should be able to hit it a couple of times before the Shagohod restarts.
After sustaining significant damage Volgin is forced to use his electric abilities to direct the Shagohod manually.
Stage 2 strategy
This time EVA will distract Volgin while you attack on foot. This is similar to the previous stage but you have to attack Volgin from behind or the sides and after each attack he will use the Shagohod to attack you. After each attack there is a slight pause, use this to attack the "treads" with a grenade. This will allow you to run to a position where you can attack him.
Another strategy is to stand near the mounted guns at the perimeter of the area. use the RPG to lock up the "treads". Then use the gun on Volgin. When Volgin can move again he will charge the gun to destroy it. Before he gets there, jump off and run to a safe spot. You can then easily hit the "treads" since you know where the Shagohod is going to be.
You can also try to knock out the treads with the RPG the shoot Volgin with the Mosin Nagant< which only takes 3-4 shots on normal.
After defeating him, a stray lightning bolt struck Volgin, killing him and destroying the Shagohod for good.
Groznyj Grad Rail Bridge North

Groznyj Grad Rail Bridge North (building at the base of the mountain), 1964.
Afterwards, EVA will drive, similar to the previous chase. However, instead of it being the Shagohod and the GRU motorcyclists, it will be GRU motorcyclists and flying platforms in pursuit of them. Like before, either focus on shooting them or, if the Cold War camo was procured earlier, simply face them. Eventually, EVA will be stopped by a blockade of two BTR-164s, forcing her to circle around and then go left, making it to Lazorevo
Easter eggs
- When Snake is putting Raikov's body into the locker, a poster of Metal Gear Solid 2 featuring Raiden is seen on inside of the locker door.
- Using the R1 viewer in the scene after Volgin dies shows The Sorrow's ghost.
| Previous Location | Krasnogorje |
| Next Location | Tikhogornyj |
| Previous Location | Tikhogornyj |
| Next Location | Lazorevo |
Metal Gear Online
Groznyj Grad acts as a map on Metal Gear Online. It includes two catapults. The southwest surveillance tower on the map can be climed, which also allows the player to use it as a makeshift sniper crow's nest, although it will also result in the player being shot at as well. Because of the wide-open spaces, players are also very vulnerable to firearms and grenades, and thus it is advisable to locate holes in the walls to crawl through in order to maintain cover and limit exposure. Similarly, the bunkers, tanks, vehicles, large shipping containers, etc. will also act as good protection. Because stealthful intrusions without getting caught by Snipers in the central hangar are difficult due to the feet clanking on the metal walkways, there are two indirect methods of infiltrating: The first is via catapult (preferably the northeast catapult unit, as it is marginally less likely that snipers will locate the player), and the next is by climbing up via the building from the west, and then methodically make way downstairs. The west side of the map (which MGS3 veterans will recognize as the West Wing) also has a stairway leading to the second floor as well as a ladder that reaches the roof of th same building, which players can use as a sniper's nest.
Notes and references
- ^ Metal Gear Solid 3: Snake Eater, Konami Computer Entertainment Japan (2004)
EVA, while under the guise of Tatyana, informed Naked Snake of this door and suggested that he use it to escape. However, Snake never got the chance to use this door due to it being sealed off as a result of Groznyj Grad being placed on Red Alert from Volgin learning that Snake escaped from his prison cell. - ^ Metal Gear Solid 3: Snake Eater, Konami Computer Entertainment Japan (2004)
Major Zero refers to this area by that name during the motorcycle chase in an optional radio conversation, should the player call him after entering this area upon evading Ocelot in the previous cutscene. - ^ Revealed when Snake interrogates some of the soldiers at Krasnogorje("In the air raid shelter... a way out")
- ^ This is especially evident with the reasons why Ivan Raidenovitch Raikov was granted access to the West Wing despite technically being of the rank of Major, and it is implied that Tatyana was exempt for similar reasons
- ^ This is implied with The Boss's and Ocelot's exemption regarding the strict access restrictions for the West Wing
- ^ This was explained in a radio conversation with Major Zero.
- ^ This was demonstrated in the cutscene and gameplay where Snake enters Groznyj Grad from Krasnogorje.
- ^ Metal Gear Solid 3: Snake Eater, Konami Computer Entertainment Japan (2004).
EVA explains this in a radio conversation when calling her about the trucks at Groznyj Grad. - ^ http://muni_shinobu.webs.com/mgs3/commentary5.html
- ^ http://muni_shinobu.webs.com/mgs3/commentary4.html